


- Introduction
- Ingredients & Tools
- Preparation of Sticky Rice
- Cooking the Mangoes
- Assembling the Dish
- Tips & Tricks
- Comparative Analysis
- Additional Tools & Downloads
- Выводы
Introduction
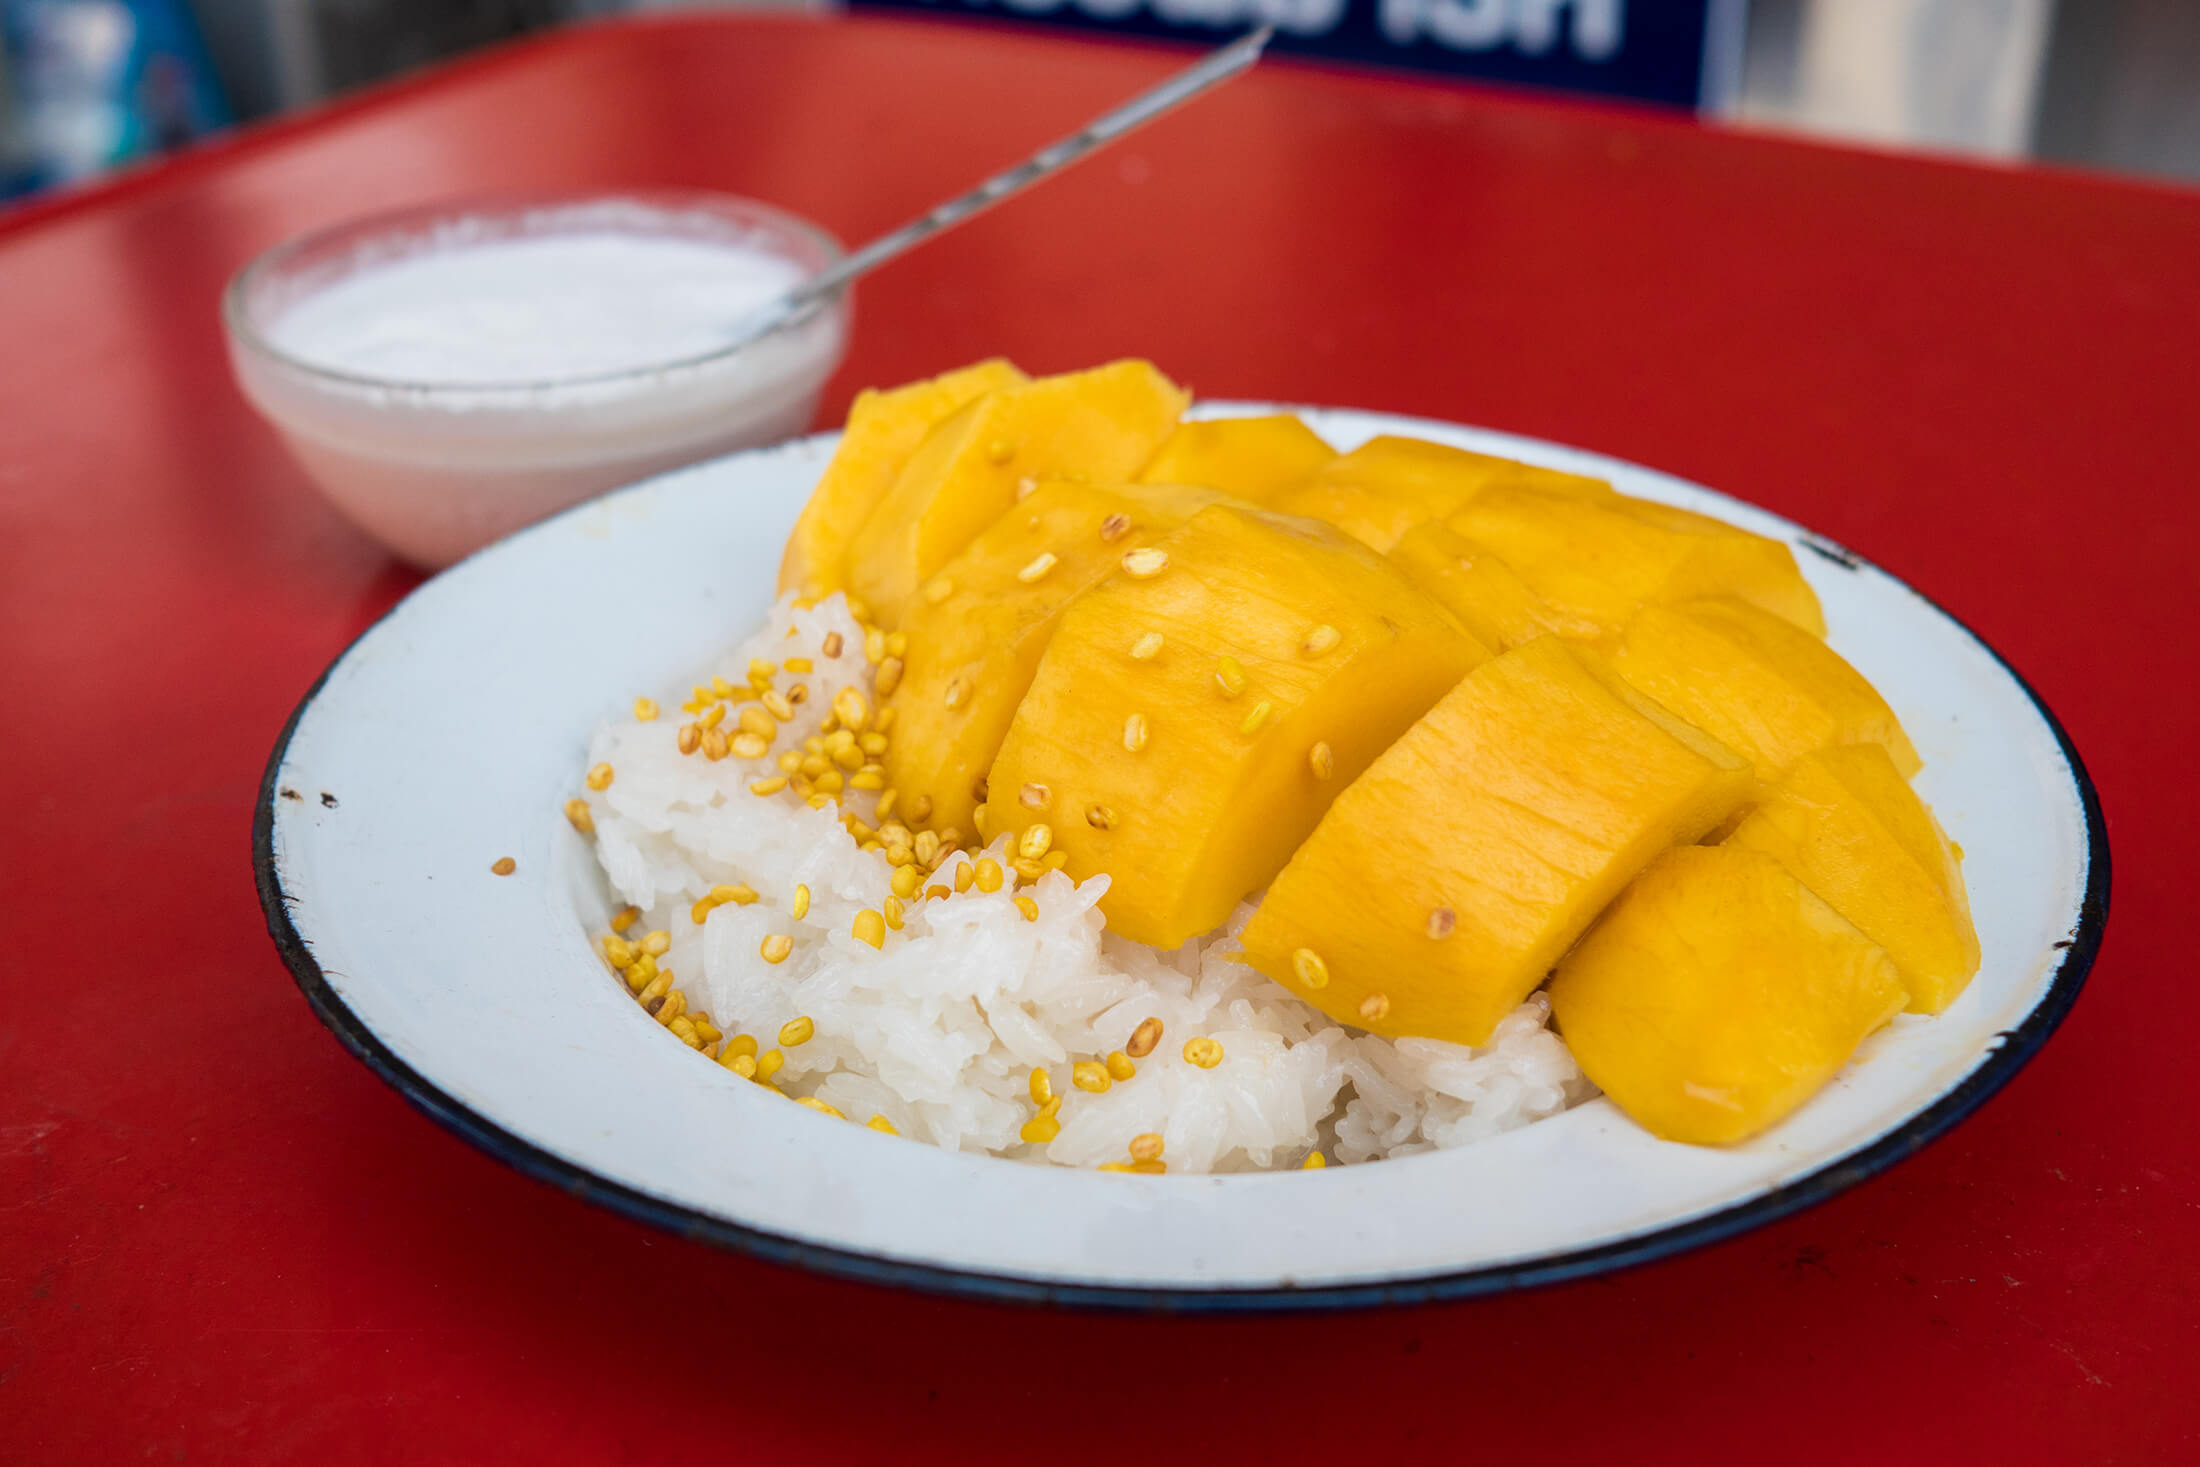
Hey there, my dear friend! If you’ve ever been captivated by the delightful blend of sweet, tangy, and creamy flavors in Thai desserts, then you’re in for a treat. Today, I’m excited to share with you my tried‐and‐true recipe for How to Make Authentic Thai Mango Sticky Rice (Easy Recipe). This dish is a celebration of textures and flavors – from the perfectly steamed sticky rice to the succulent, ripe mangoes, all drizzled with a luscious coconut sauce. Whether you’re hosting a dinner party or simply craving a comforting dessert, this guide will walk you through every step with plenty of friendly advice along the way.
To kick things off, imagine the aroma of freshly steamed rice mingling with the tropical scent of coconut milk, while the vibrant colors of mango slices make your plate look like a work of art. Trust me, once you try this, you’ll want to make it again and again!

Ingredients & Tools
Before we dive into the cooking process, it’s important to gather all the ingredients and tools you’ll need. Here’s a comprehensive list:
- Sticky Rice: 1 cup glutinous (sweet) rice
- Coconut Milk: 1 can (about 400ml) of full-fat coconut milk
- Sugar: 3-4 tablespoons (adjust based on sweetness preference)
- Salt: A pinch
- Ripe Mangoes: 2-3, peeled and sliced
- Optional Garnish: Sesame seeds or mung beans for a crunchy contrast
Essential Tools:
- A steamer or rice cooker (traditional or electric)
- A heavy pot for cooking the coconut sauce
- A large mixing bowl
- A sharp knife and cutting board
- Measuring cups and spoons
If you’re a fan of organizing your recipes digitally, consider downloading a recipe manager app. This can help you store, categorize, and even share your culinary adventures with friends. For instance, the Recipe Keeper App is a popular choice among cooking enthusiasts.
# Example installation steps for Recipe Keeper App:
1. Visit: https://www.recipekeeperapp.com/download
2. Choose your operating system.
3. Download the installer.
4. Run the installer and follow the on-screen instructions.
Preparation of Sticky Rice
The foundation of our dish is the perfectly cooked sticky rice. Here’s how to prepare it:
- Rinse the Rice: Rinse 1 cup of glutinous rice under cold water until the water runs clear. This removes excess starch and ensures a better texture.
- Soak: Place the rice in a bowl and cover with water. Soak for at least 3-4 hours, or ideally overnight, to allow the grains to absorb moisture.
- Steam the Rice: Drain the rice thoroughly and transfer it to a steamer lined with cheesecloth. Steam over boiling water for about 20-25 minutes, or until the rice is tender and fully cooked.
- Mix with Coconut Sauce: While the rice is still hot, gently fold in a warm mixture of coconut milk, sugar, and a pinch of salt. This not only flavors the rice but also gives it that irresistible creamy texture.
Pro tip: Make sure to heat the coconut sauce just enough to dissolve the sugar completely before mixing it with the rice. This step is crucial to achieve the right consistency and flavor.

Cooking the Mangoes
While the sticky rice is absorbing all that sweet, creamy goodness, it’s time to prepare the mangoes. Choose ripe, fragrant mangoes for the best flavor.
- Peel & Slice: Carefully peel the mangoes, then slice them into thin, elegant pieces. The slices should be thick enough to hold their shape, yet delicate enough to blend with the sticky rice.
- Chill: For an extra refreshing twist, place the mango slices in the refrigerator for about 15 minutes before serving.
- Optional Caramelization: If you fancy a slight caramelized note, you can lightly sauté the mango slices in a non-stick pan with a touch of butter for just 1-2 minutes on each side. This step is optional but adds a unique depth of flavor.

Assembling the Dish
Now that your sticky rice is infused with coconut goodness and your mangoes are perfectly prepped, it’s time to bring everything together.
- Plate the Rice: Scoop a generous serving of sticky rice onto a plate. Use the back of a spoon to create a small well in the center.
- Arrange Mango Slices: Artfully arrange the mango slices around or on top of the rice. Don’t be afraid to get creative with your presentation!
- Drizzle Extra Coconut Sauce: For that extra burst of flavor, drizzle any remaining coconut sauce over the dish. You can also sprinkle toasted sesame seeds or roasted mung beans on top for added texture.
- Serve Warm or Chilled: Enjoy this dessert at room temperature or chilled from the refrigerator. It’s a versatile treat that adapts to your mood and the season.
The harmony between the sweet mangoes and the rich coconut-infused sticky rice is truly magical. Every bite tells a story of tradition, passion, and the joy of sharing good food with friends.
Tips & Tricks
I’ve learned a lot over the years from experimenting with this recipe, and I’d like to share some insider tips to help you perfect your Thai Mango Sticky Rice:
- Rice Texture: For best results, use glutinous or sticky rice specifically. Regular rice won’t give you that authentic texture.
- Coconut Milk Selection: Use full-fat coconut milk for a richer taste. Light coconut milk might not provide the desired creaminess.
- Mango Variety: Ataulfo or Alphonso mangoes are ideal due to their natural sweetness and soft texture.
- Consistency Control: Adjust the amount of coconut sauce based on your texture preference. If you like it creamier, add a bit more sauce.
- Practice Patience: Good things take time! Let the flavors meld by allowing the rice to rest for a few minutes after mixing in the sauce.
“Food is not just fuel, it’s information. It talks to your DNA and tells it what to do.” – Dr. Mark Hyman
These small tweaks can transform your dish from good to absolutely unforgettable.
Comparative Analysis
To help you decide on the best method and tools for preparing your Thai Mango Sticky Rice, here’s a comparative analysis of the primary cooking tools and methods used:
| Tool/Method | Pros | Cons | Download/Manual Link |
|---|---|---|---|
| Rice Cooker |
|
| Download Guide |
| Steamer Basket |
|
| Download Manual |
| Recipe Keeper App |
|
| Download App |
Additional Tools & Downloads
For enthusiasts who love exploring every facet of cooking, here are some extra tools and resources you might find useful:
- Recipe Keeper App: As mentioned earlier, this app is fantastic for organizing and storing your favorite recipes. Download it from
here. - Digital Kitchen Timer: Use a smartphone or a dedicated timer app to ensure precise cooking times. Check out free timer apps available on both the App Store and Google Play.
- Cooking Blogs & Video Tutorials: Enhance your skills by following detailed guides on platforms like YouTube or dedicated food blogs.
# Example: Setting up a digital timer using a free app
1. Visit the respective store (App Store or Google Play).
2. Search for "Digital Kitchen Timer".
3. Download and install the app.
4. Use it to time your rice steaming and mango preparation steps.
Conclusion
In this comprehensive guide, we uncovered the secrets behind crafting an authentic Thai Mango Sticky Rice that’s as visually stunning as it is delicious. We learned the importance of using the right type of rice, how to infuse it perfectly with a creamy coconut sauce, and the art of preparing fresh, succulent mangoes to complement the dish. Along the way, we explored various tools—from traditional steamer baskets to modern rice cookers—and compared their advantages and drawbacks.
Most importantly, this journey has shown us that cooking is an art that combines tradition, precision, and a little bit of creativity. Whether you’re a seasoned cook or just starting out, this recipe offers a delightful way to experience authentic Thai flavors right in your own kitchen.
Thank you for taking the time to dive into this detailed guide. I hope you feel inspired and confident to try out this recipe for yourself. Enjoy the process, experiment with the flavors, and most importantly, savor every bite. Happy cooking, my friend!

Leave a Reply